Showing posts with label Tutorial. Show all posts

Tuesday, 27 January 2009

Emergency cards......

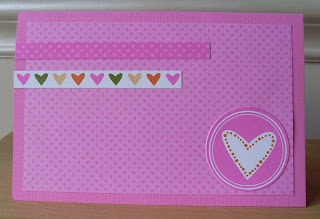
How often do we need a card in a hurry? Whether to say Hi!, Thank you, Miss you! or even Happy Birthday!

This is a little box and set of cards that you can give as a gift to someone you know who might need a card in just such an emergency!

They are made from the wonderful Petal Party Simply Scrappin' kit. Yes, Simply Scrappin' kits are not just for Scrapbooking! At £15.50 it's a fantastic price and you can get 24 cards (2 each of 12 designs) and 4 boxes from one kit.......Brilliant if you are looking to make gifts this year.


I have full instructions and will send them out to anyone who buys a Petal Party Simply Scrappin' kit from me.

Happy Stampin'

Amanda

Tuesday, 20 January 2009

Owl Bookmark

A quick post about an Owl..........

This is a bookmark we made at my Mum and Me class last September for some reason I never posted the tutorial so here it is better late than never!

Embellishments and Tools

3” Paperclip
Hot glue gun or other strong glue
Old Olive Ribbon
Black marker pen and White gel pen
1 3/8 ” Punch
½ ” punch
Boho Blossoms punch
Scallop circle punch
Round Tab punch

1. First punch and cut out all your pieces 1 3/8” punch 4 x Chocolate Chip, 1 x Close to Cocoa, ½ ” Circle punch 2 x Old Olive, Round tab punch 1 x Chocolate Chip, Boho Blossoms punch 2 x Creamy Caramel. Cut a small triangle for a beak from Creamy Caramel.
2. Stick 1 of the Chocolate Chip circles to each side of the top of the paperclip.
3. Draw black and white eyes onto the Old Olive circles and attach them with the beak onto the Chocolate Chip round tab punch.
4. Make wings by punching part of the Chocolate Chip circles through the scallop circle punch, about 4 scallops is the right size.
5. Stick 2 of the small flowers underneath the Close to Cocoa 1 3/8” circle to make feet and attach the wings to the top section., Then add the head.
6. Put glue onto one of the Chocolate Chip circles attached to the Paperclip and stick the owl to it.
7. Tie the ribbon to decorate the bookmark.


Wednesday, 24 December 2008

Coaster Calendar Tutorial

As promised here is the coaster calendar tutorial.

You will need

2 Coasters 
4     4" square pieces of Designer series paper ( I have used  Rainbow Sherbert)
Toning 1/4" grosgrain ribbon ( Tempting Turquoise)
A calendar and mat layer of toning card stock
3 flowers punched from co-ordinating colours of card stock I have used Apricot Appeal, Green Galore and Tempting Turquoise and the 5 petal flower punch and Boho Blossoms punch
Brad, piercing tool and mat
Strong double sided adhesive
Cropodile
Sanding block or sand paper


Stick the paper to one side of the coaster, lining up 2 of the edges so you have to trim less.


Trim around the edge of each coaster, then stick down a second piece of paper on the other side and trim again. 


Using your sanding block sand down the edges of the paper, don't use a backwards and forwards motion as this will lift up the paper from the coaster, just keep sanding in one direction down towards the coaster. The designer paper has a white core and this is what you can see on the next picture. You are aiming for a nice smooth rounded edge on all sides.


Lay the coasters on top of one another making sure all the edges match, then using your Cropodile punch 3 holes through both coasters. Because the Cropodile is so strong it will easily go through both layers at once.


Decide which sides are going to be on the inside and thread ribbon through as shown. Tie knots and trim the edges of the ribbon.  The knots will be on the inside of the coaster.


The back of the calendar will look like this.


Layer the 3 flowers on top of one another and stick together with a brad, mat the calendar onto the cardstock.


Finish your calendar as shown in the picture below.


Friday, 31 October 2008

Ric Rac Tutorial

Thank you for the emails requesting this tutorial, I have kept the words to a minimum and the pictures will do the talking, a big thank you to my son for taking the pictures.

Happy Stampin'

Amanda

Ric Rac Tutorial

Start with a thin strip of card stock, I have used 1" or 2.5cm.  I always start in the middle when punching so the scallops at each end are even.


For your second and subsequent punches make sure you line it up correctly NOT like the picture below!


Line it up like this one!

Your first edge complete.


Now trim off one edge of the scalloped border, cut straight up between 2 scallops, I just love my new paper snips!


It should look like this.


Now turn the cardstock over and put the straight edge back into the punch, don't line it up like this.......


You need to offset it as the picture below shows half way across a scallop.  This is the most important part.


It doesn't matter where you start once it is lined up.  Then just punch as normal, lining it up to cover the scallops and work your way along the edges of the cardstock, as the next 2 pictures show.


There you have it, play around with different widths of cardstock to get different ribbons.


Sunday, 17 August 2008

Flutterby

It has been a while since I posted a tutorial so here you are, we made this card in my workshop at Newbury.

This uses the Stampin' Pastels and Versamark ink. Now the Stampin' Pastels are artist grade chalks and they come in a palette of our 48 colours along with neutrals as well. You can do lots of wonderful things with them but for this card we will use the Poppin' Pastels Technique.

Now you will see I have said you need to pounce your Pastels onto the versamark ink, think of a cat pouncing on a mouse!........ Do not rub or scrub with them until the colour is pounced into the ink you will just smear the ink and pastels everywhere and it will look messy!

This card fold is an 'M' fold with a smaller section at the front, one of my favourites of the moment.

Have fun!


Bold Butterfly

Taken with Teal card stock 29cm x 15.5cm scored at 9.5cm (mountain), 19cm(valley) and 24cm (Mountain) this give you an M shape.
Basic Black mats of 15cm x 9cm and 15cm x 4.5cm
Whisper White mats of 14.5cm x 8.5cm and 14.5cm x 4cm
Scraps of Taken with Teal, Basic Black and Whisper White for punched flower
Black gingham ribbon
Taken with Teal ink
Scallop punch
1” punch
1 ¼” Punch

1. Stamp the shadow stamp of the small butterfly randomly over the larger piece of Whisper White card with versamark ink and using sponge daubers and Taken with Teal pastels pounce the colour into the card, blow away excess pastels. Over stamp the matching butterfly outline image with Taken with Teal ink.
2. On the smaller piece of Whisper White card repeat using the shadow flower stamp and the flower outline stamp.
3. Mat the Whisper White stamped cards onto the corresponding Basic Black card and attach to the Taken with Teal card.
4. Wrap a piece of black gingham ribbon around the butterfly stamped mat and tie into a knot or bow. Stamp a sentiment onto a piece of Whisper White card and punch out with a 1" punch, Punch a 1 1/4" Basic Black circle and a scallop from Taken with Teal and mat to make a flower, stick this over the top of the ribbon to secure it in place.
5. Stamp the outline of the butterfly onto a scrap piece of Taken with Teal in White Stazon or Taken with Teal ink and glitter using 2 way glue pen and Dazzling Diamonds, cut around the outline and using dimensionals mount onto the front of the card.

Thursday, 22 May 2008

Penny Spinner Instructions

Penny Spinner Cards

Craft knife and metal ruler
Image to spin
3D Stampin' Dimensionals
2 x 1p coins
Cardstock, paper and embellishments

1. Take your folded card and layer a piece of patterned paper ¼” or 0.5cm smaller onto the front.
2. Cut a piece of strong cardstock for the spinner holder, the size will be determined by how much of the backing paper you wish to see, between ½” or 1cm and 1 ½” or 3cm is about right.
3. Working on the reverse side of the spinner holder find the centre point of the card and draw a cross going to each edge of the card.
4. From the centre point mark a line 0.7cm above and below, stop the line 2cm in from the edge (you can vary this dependant on the size of the item that will spin.)
5. Using a metal ruler and craft knife cut this rectangle out. It is much better to cut inside the line and trim off rather than cut too big in the first place !
6. Sandwich a foam circle in between 2 pennies and attach the item to spin onto the top of one of the pennies, slot into the cut section of the card with a penny on either side. Check to see if it spins. If it gets stuck then trim a little excess off the card. Sometimes it takes a few goes for it to get started.
7. When you are happy it works attach the spinner holder card to your card front using foam pads or tape, make sure you use plenty so the pennies can move freely. Decorate the card further if you wish.

Top Tip

If you make a template for a A5, Square and DL card following the steps 4 – 7 using pieces of scrap card, you can just trace out the image on the back and cut out without having to measure every time!

Variations

Diagonal spinner – Find the centre point from each diagonal corner, mark the slot as before working on the diagonal lines.

Wobbly line – Use a free hand blade to cut the top line on a scrap piece of card and draw a pencil line along it. Then move the scrap piece of card approximately 1.4 cm down and mark a second line and cut out as before.

Saturday, 2 February 2008

My Wonderful Hostesses

My hostesses are very special, they invite me to their homes, to meet with their friends and family to have a fun filled afternoon or evening of papercrafting and to find out all about the wonderful things they can create with Stampin' Up! products.

Before each home workshop I spend time talking to the hostess about the things she is interested in and what fun projects we can create together. Last night I had a wonderful home workshop hosted by Vicky who is a very talented card maker, She loves to give personalised gifts to go with her wonderful cards so I thought this little bag would be great for her and she loved it.

The tutorial follows


You need
1 x A4 Card stock I used Tempting Turquoise
Seeing Spots Stamp set
Small piece of Tempting Turquoise and Pumpkin pie cardstock
Tempting Turquoise ink
Pumpkin Pie Ribbon
Mini Glue dots
1 brad
Scissors
Cropodile
Tag punch

On one side of the card stock stamp random images all over using the Tempting Turquoise ink and the Seeing Spots stamps, make sure some of the images go over the edges of the card as this gives a more professional finish.


Turn the card over and score at 6cm in from each of the long sides.


Then score at 12cm in from each of the short sides


No the slightly tricky bit...you need to measure 6cm the point where the lines cross over along the long side, you are going to make a diagonal score line to the outer edge. Please use the photo to guide you. As you do more you won't need to measure!


Now fold in thelong sides to the centre and on one side only puch 2 holes about 2 cm apart through the layers of card stock. You will also need to crease the diagonal folds you made at the last set so they sit as shown in the photo. The sides of the bag will also need to fold in a little it looks like a 'W' shape in the photo.


Now fold in the other side ( the one without any holes).


Stamp the thank you and flower onto some Pumpkin Pie card stock and punch out a tag shape. Stamp the flower a second time onto Tempting Turquoise cardstock and cut it out. Using a Tempting Turquoise brad I covered it in a mini glue dot , this was something Shelli demonstrated at the Open night in London and is a really neat trick! The mini glue dot is a perfect size and you just rub it over the brad so it shapes to the sides of the brad then you dip it in Dazzling Diamonds a fantastic fine glitter. The great thing about using a coloured brad is the glitter allows the colour to shine through. I then attached the cut out flower to the tag with the glittered brad.

You need to thread the ribbon through the holes from the inside of the bag, then turn the bag so the holes are at the back and bring the ribbon around to the front. Thread on the tag and fasten the ribbon, trim the ribbon to size, all finished.


This bag was inspired by the one sheet box tutorial on Splitcoast Stampers Forum, I have adapted the sizing to fit UK paper sizes, and tweaked and added my special touch.

All images copyright Stampin' Up! 1990 - 2007 and created by Amanda Fowler